Drawing a Simple Floor Plan on a Drafting Board
A PRIMER IN DRAWING A FLOOR PLAN ON THE DRAFTING BOARD
This primer course was created to give you the majority of skills needed to learn technical drawing on the drafting board for our more in-depth courses in residential and commercial architecture. Please pay close attention especially to the use of the pencil and drafting tools.
GETTING STARTED
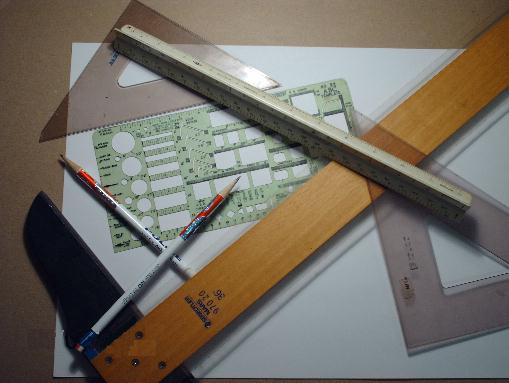
What’s needed:
- A drafting board of course. Probably best to use one that will hold a 24 inch wide by 18 inch high (18″ x 24″) sheet of paper, although for this course, we’ll be using an 11 inch by 17 inch (11″ x 17″) sheet for this manual drafting primer.
- A Tee Square, drafting machine, or Parallel Bar. This way you can draw the floor plan square. Accuracy is important. The Tee square is used on the left side of the drafting board to keep the drawing in square. This insures that your parallel lines are actually parallel.
- Two 45 degree drafting triangles. One of them needs to be around 10 inches in size.
- An Architectural Template at 1/4″ scale.
- Two or three #2 lead pencils with eraser. Make sure you have a premium quality sharpener and white pencil cap erasers. (You can use a gum eraser if you wish.)
- 11″ x 17″ white printer paper. Transparent paper is preferable as it will aide you in tracing your drawing if you continue on with the rest of the lessons. (Vellum or Transparent Bond Paper)
- 1/2″ roll of Masking Tape
![[Image]](https://draftingboard.us/simple/pict29.jpg) We’re going to draw the floor plan for what some call a hideaway cabin. This little rascal is roughly 24 feet wide by 28 feet deep. If you’ll click on the image to the left, a pdf file containing my sketch will open in a new window. We’ll begin with this sketch. Study the drawing and you will find the general dimensions and room locations you will need to draw this plan.
We’re going to draw the floor plan for what some call a hideaway cabin. This little rascal is roughly 24 feet wide by 28 feet deep. If you’ll click on the image to the left, a pdf file containing my sketch will open in a new window. We’ll begin with this sketch. Study the drawing and you will find the general dimensions and room locations you will need to draw this plan.
To begin with, if you have never used the tools you’ve bought or borrowed, play with them a bit. Find some scratch paper and doodle (draw) around with the template. Try not to use TOO much pressure on your pencil when following the outline of the shapes.
When ready, let’s start by preparing the paper for use on the board.![[Image]](https://draftingboard.us/simple/pict42.jpg)
Just so you’ll know. The scale you should have is nothing more than a shrunken ruler so that 1′ -0″ (12 inches) is now 1/4 inch long as far as your drawing is concerned. Look at the longest mark exactly “between” 0 and 2. That would be your 1′ (foot) mark. Then the mark next to that one would be 6″ (inches) because it is exactly in the middle between the 0 and the 1′ mark.
If you look to the right of the “0” (zero), you’ll see the inch gradients where each mark equals one inch on the 1/4″ scale. Count them and you will find 12 marks.
Start by placing the Tee Square on the left bottom part of the drafting board and then place your 11″ x 17″ paper on top of the tee square. Give yourself plenty of room to work on the left of the board.
-
Note – placing the paper right on the edge of the board is also a bad practice because:
-
You will need room to use your tools like the scale or template on the edges of the drawing without them dangling.
-
Drawings tend to get dirty on the edges when close to the edge.
![[Image]](https://draftingboard.us/simple/pict30.jpg)
-
Next, I want you to tape the corners of the paper to the board as shown to the right. Remove the tee square and tape the bottom the same way you taped the top.
The next step is to mark the middle point of the paper so that our work will be centered on the sheet. To accomplish this we mark the left middle of the paper using the scale. If your scale is like the rest of the architectural scales in the real world, you will find a full scale ruler on it. The paper is 11″ on the left so we place our mark at 1/2 of this measurement which is 5 1/2″
![[Image]](https://draftingboard.us/simple/pict35.jpg) On the top of the paper which is 17″, we need to make a mark at the 8 1/2″ measurement. Remember to keep your pencil sharpened. The sharper the point, the more accurate the drawing and the easier it is to place your line where it’s needed.
On the top of the paper which is 17″, we need to make a mark at the 8 1/2″ measurement. Remember to keep your pencil sharpened. The sharper the point, the more accurate the drawing and the easier it is to place your line where it’s needed.
Line up your tee square or parallel bar with the left side mark and draw a light (don’t press hard on the pencil) horizontal line through the middle of the page. Then, lower your tee square and place your triangle as shown to the left. Using the vertical side of your triangle, draw a vertical line from your mark so that your drawing looks like the image shown to the right. Don’t worry, this will be erased later. ![[Image]](https://draftingboard.us/simple/pict39.jpg)
THE BODY OF THE HOUSE
I need to explain the next step to you so it is clear. If you will look at the sketch, you will see that it isn’t a perfect rectangle. But to make sure we have a balanced, not out of square drawing, I like to build what is called the perimeter limits barrier. In other words, a control that helps me keep the drawing to the intended size. If I go out of this barrier, I’ve goofed somewhere.
So lets look at the sketch and ponder on the following:
-
If the house is 28′-0″ deep and the porch is 6′-0″ deep, the sum of the two dimensions is 34′-0″. Right?
-
Half of 34′-0″ is 17′-0″. So on each side of the horizontal line, place a mark to the top and bottom of the middle horizontal line at 17′-0″ and then lightly draw the lines which represent the front and back of out house.
-
-
If the width of the house is 16′-0″ and 8′-0″ then the sum of the two dimensions is 24′-0″. Right”
-
Half of 24′-0″ is 12′-0″. So on each side of the horizontal line, place a mark to the top and bottom of the middle horizontal line at 12′-0″ and then lightly draw the lines which represent the front and back of out house.
-
Once completed your drawing should look like the image to the right.![[Image]](https://draftingboard.us/simple/pict41.jpg)
![[Image]](https://draftingboard.us/simple/pict43.jpg) Here’s where we start drawing the perimeter walls of the house. Again, we want to draw them lightly because it will be easier to erase what does not need to be there when we need to. Now draw the house inside of the barrier according to the sketch and then erase all the unnecessary lines. Your drawing should look like the image to the left.
Here’s where we start drawing the perimeter walls of the house. Again, we want to draw them lightly because it will be easier to erase what does not need to be there when we need to. Now draw the house inside of the barrier according to the sketch and then erase all the unnecessary lines. Your drawing should look like the image to the left.
The next step is to draw all the walls. Don’t worry, I’ll walk you through this part as best I can.
Facts about walls.
There are no walls that are exactly 4″ wide. 2×4 is a general term used in the industry trade, to let you know the general size of a piece of lumber is close to 2″ thick by 4″ wide. But to avoid confusion and extra detailed work, we’re drawing wall sizes in general at 4″.
![[Image]](https://draftingboard.us/simple/pict44.jpg)
I’m not going to do all the thinking work for you folks. We learn by doing. I am going to tell you some general things and then you can figure out the rest. If you can’t figure it out, I’m still not going to leave you hanging. Just make a comment on this page with your questions and I’ll try my best to answer them for you.
Lets look at the closet and mini hall next to the bedroom. This closet is 3′-0″ deep from right to left. And the little mini hall is 3′-8″ deep from the living room wall to the closet wall vertically. The bathroom is to be 5′-0″ wide vertically and if you measure from inside wall to inside wall horizontally, it will be 7′-8″. Once you have it figured out, the plan should look like the top left image.
Not sure you can make it out because my lines are so light, but I have my drawing to the same stage you should have yours.
![[Image]](https://draftingboard.us/simple/pict45.jpg)
THE DOORS AND WINDOWS
![[Image]](https://draftingboard.us/simple/pict46.jpg)
Our next step is to draw the door and window locations. That’s where our architectural template comes in handy. The architectural template comes complete with doors in the swinging position. If you want the door to swing right, use the template on its face. If you want the door to swing left, flip the template over on it’s back. Swing is where the hinge is if you are facing the door where it swings away from you. Notice that on my template as with most others, the door is only partially open and is presented in five sizes. 3′-0″ or 36″, 2′-8″ or 32″, 2′-6″ or 30″, 2′-4″ or 28″, & finally 2′-0″ or 24″. These are basically the standard sizes used in houses today. At least here in the United States.
![[Image]](https://draftingboard.us/simple/pict47.jpg)
![[Image]](https://draftingboard.us/simple/pict48.jpg) I’m going to show you how to place a door. Then I want you to do the rest of the doors. The image to the left is the bathroom door. It swings into the bathroom on its hinge to the left. The door is also a 2′-4″ (28″).
I’m going to show you how to place a door. Then I want you to do the rest of the doors. The image to the left is the bathroom door. It swings into the bathroom on its hinge to the left. The door is also a 2′-4″ (28″).
Measure 4″ from the inside wall down. that is where we will hinge it. Why 4″? It’s my preference because most framers like the extra inch to place the door trim.
From your 4″ mark, place the template face down because it’s a left hand swing door and trace the door on your drawing. Go ahead and press a bit harder with your sharpened pencil so that the lines are a bit darker. Your drawing should look just like or similar to the image on the left. That’s all there is to it.
OK, below is a list of the door sizes and their swings. You go ahead and draw the remaining doors with the information I just provided.
Door sizes and locations:
-
The Closet Door is 2′-8″ (32″) and is a right hand swing. 2′-8″ (32″) and is a right hand swing. Place it swinging out into the bedroom.
-
The Bedroom Door is 2′-8″ (32″) and is a left hand swing. Place it swinging into the Bedroom also.
-
The Rear Entry Door ins 2′-8″ (32″) and is a right hand swing. Place it swinging into the mini hall.
-
The Front Entry Door is 3′-0″ (36″) and is a right hand swing. Place it in the middle of the front of the house swinging into the Living Room.
When completed, your drawing should look like the image below.![[Image]](https://draftingboard.us/simple/pict49.jpg)
![[Image]](https://draftingboard.us/simple/pict51.jpg) Notice the image on the left. I just placed the windows on the plan so let me tell you how I did it.
Notice the image on the left. I just placed the windows on the plan so let me tell you how I did it.
![[Image]](https://draftingboard.us/simple/pict52.jpg)
There’s nothing complicated about windows in the plan view. In the image above, I simply drew a couple of vertical lines to represent the width of the window, the distance I wanted the window to be from the outside wall, and then drew a horizontal line between them. No, don’t draw the dimensions shown. I just placed them there for a reference.
Window sizes and locations:
-
You already have the location of the front left window and it’s width. I need to give you the window size for reference. This window is going to be a 3′-0″ horiz. by 5′-0″ vert. window.
-
The window in the bedroom will be centered on the back wall. It is also a 3′-0″ horiz. by 5′-0″ vert. window.
-
The Kitchen window will be centered over the sink and you need not draw it now. It’s size will be 3′-0″ horiz. by 3′-0″ vert. window.
-
The Bathroom window will also be centered on the back wall and it’s size will be 2′-0″ horiz. by 3′-0″ vert. window.
![[Image]](https://draftingboard.us/simple/pict53.jpg)
A LITTLE CLEAN-UP
Alright then. If you have your windows and doors drawn in, then lets darken the walls and erase the lines that don’t belong there.
![[Image]](https://draftingboard.us/simple/pict54.jpg) To darken the walls we increase the pressure on the pencil. Make sure to keep your pencil sharp. Those of you using mechanical lead pencils need to make sure you keep your pressure uniform. Notice that I erased both sides of the wall for interior doors and only erased the inside part of the wall on all exterior doors.
To darken the walls we increase the pressure on the pencil. Make sure to keep your pencil sharp. Those of you using mechanical lead pencils need to make sure you keep your pressure uniform. Notice that I erased both sides of the wall for interior doors and only erased the inside part of the wall on all exterior doors.
(drawing tip: to keep your line uniform in width, you can rotate the pencil between your fingers as you draw the darkened line)
One tool I didn’t mention was something called an eraser shield. An eraser shield is a thin flat piece of flexible metal (stainless steel) that you lay over what you don’t want to erase so that you can get close to the dark line without erasing it. This little tool is as handy as a hay rake if you are going to draft manually. Watch the video below to learn how to use this tool.
GETTING READY TO FINISH THE REST OF THE HOUSE
OK campers, we have gotten it to this point. We’ve come a long way in such a short time, Haven’t we? Make sure you double check your measurements and such. It’ll be important that the drawing is accurate. I want you to turn your attention back to your template now. On most all architectural templates you will find toilets, bathtubs, wall mounted sinks, etc…
![[Image]](https://draftingboard.us/simple/pict56.jpg)
You’ll remember I asked you to draw your Bathroom at 5′-0″ wide vertically. This is because most tubs are 60″ (5′) wide and most are designed to have a wall on each side of them. Place the bathtub part of the template with the flat part of the tub facing down and draw it into the bath close to the right wall. The from the wall draw a vertical line to finish the symbol for the tub. Then draw the toilet and the vanity just as it is shown on the left image.
![[Image]](https://draftingboard.us/simple/pict57.jpg)
F.Y.I., most all vanities are 22″ (1′-10″) deep and 32″ tall. Also always make sure you have at least 8″ on each side of a toilet.
![[Image]](https://draftingboard.us/simple/pict59.jpg)
OK, lets draw the Kitchen cabinets. These cabinets are 24″ (2′-0″) deep.
- Make the area for the refrigerator. It should be a minimum of 38″ to accommodate at least a double door model.
- Make a 12″ (1′) cabinet between the refrigerator and the stove. A standard stove is usually about 30″ (2′-6″)
- Draw your Kitchen window in and center the sink on it. The center to the window & sink is shown to the left.
- Draw hidden lines ( _ _ _ _ _ ) 12″ (1′) from the wall to show the upper cabinets. At the window, give a 4″ space from the window to the upper cabinet to allow the owner room for curtains and such.
- Use your template to draw in the refrigerator, stove, & sink.
- Double check your dimension using your scale.
The final steps before labeling and dimensioning your plan is to add a 12″ (1′-0″) shelf to the Bedroom closet and 4″ x 4″ Wood Posts to the Front porch.
![[Image]](https://draftingboard.us/simple/pict61.jpg)
The image above should give you enough info to draw the posts on the porch. Notice the “X” in the middle of the posts. This is a standard to show a cut through view of a piece of lumber.
![[Image]](https://draftingboard.us/simple/pict63.jpg)
The Closet is a simple matter also. Just draw lines 12″ (1′-0″) from the closet walls to illustrate shelves.
When all is said and done, your drawing should look very similar to the image below!
![[Image]](https://draftingboard.us/simple/pict62.jpg)
The process of drawing plans on the drafting board isn’t really a difficult one actually. When you allow your tools to do the major work for you, all it takes is a fairly steady hand.
![[Image]](https://draftingboard.us/simple/pict58.jpg) Let me show you a little trick to make things even easier on you. Notice the picture to the left. What you see is the Tee Square resting at the bottom of the board. If yours is like most other drafting boards, there is a stop ledge at the bottom of the board for the tee square to rest on.
Let me show you a little trick to make things even easier on you. Notice the picture to the left. What you see is the Tee Square resting at the bottom of the board. If yours is like most other drafting boards, there is a stop ledge at the bottom of the board for the tee square to rest on.
Next I want you to notice the two triangles setting on the tee square. For most of this drawing I haven’t even moved the tee square but have slid these two triangles across the square to make my horizontal and vertical lines. Saves time and aggravation that way. It takes practice too because you need to make sure the bottom triangle is resting firmly against the tee square.
![[Image]](https://draftingboard.us/simple/pict65.jpg)
LETTERING
Now is the time we prepare to label and dimension your plan. This is going to take some practice on your part.
![[Image]](https://draftingboard.us/simple/pict66.jpg) Facts about Architectural Lettering:
Facts about Architectural Lettering:
-
ALL WORDS MUST BE IN CAPITOLS. That’s what’ll take some getting used to. There’s just a bit more clarity of meaning when all words are capitalized.
-
The lettering must be plain and clear. Otherwise the information you’re wanting to get across may be misunderstood. Misunderstanding costs money, and if the misunderstanding comes from you, it’ll probably come out of your pocket.
![]() For standard text we will make the height 4″ in the architectural scale. This roughly translates into 3/8″ tall letters in real world. As shown to the left, draw two (2) light parallel lines on another piece of paper spaced 4″ apart at whatever length you wish.
For standard text we will make the height 4″ in the architectural scale. This roughly translates into 3/8″ tall letters in real world. As shown to the left, draw two (2) light parallel lines on another piece of paper spaced 4″ apart at whatever length you wish.
![[Image]](https://draftingboard.us/simple/pict68.jpg)
Exercise #1 ~ Practice lettering the alphabet… A B C D E F G H T J K L M N O P Q R S T U V W X Y Z. Then draw two more lines at 4″ apart, and 2″ from the top guide lines and practice writing your numbers 0 through 9… 0 1 2 3 4 5 6 7 8 9
The trick is to always make each letter is the same shape and uniform size as shown to the left.
For standard text we will make the height 4″ in the architectural scale. This roughly translates into 3/8″ tall letters in real world. As shown to the left, draw two (2) light parallel lines on another piece of paper spaced 4″ apart at whatever length you wish. Notice the uniformity?
Exercise #2 ~ Now I want you to repeat the exercise but with very little space between the letters as shown to the left.
![[Image]](https://draftingboard.us/simple/pict69.jpg) Exercise #3 ~ Increase the size of your lettering to 8″ and then to 12″ high letters as this will be needed on the plan as well. Some place a line in the middle of their reference lines for further control. See if that works for you or not. Repeat these exercises as often as you like and then we will move on. The more practice, the better you will get.
Exercise #3 ~ Increase the size of your lettering to 8″ and then to 12″ high letters as this will be needed on the plan as well. Some place a line in the middle of their reference lines for further control. See if that works for you or not. Repeat these exercises as often as you like and then we will move on. The more practice, the better you will get.
- Note, some use a straight edge like your triangle to draw the letters, some don’t. Experiment to see which works better for you. I prefer freehand myself. Some people also use Lettering templates. I consider these a handicap to speed but that would be your choice too.
DIMENSIONING
Now that you’ve practiced your lettering, lets move on to the dimensions. These are a necessary part of the plan that must be there in order for the builder to know how to build the house. Be so very careful with this process. If you mess up a dimension, there is going to be a problem on the construction site. It’s up to you to make sure this doesn’t happen.
![[Image]](https://draftingboard.us/simple/pict70.jpg)
I want you to first draw light lines from the corners of your plan as shown in the image above. These will be our guides to draw the exterior dimensions.
![[Image]](https://draftingboard.us/simple/pict71.jpg) You’ll notice that I didn’t take the lines directly to the plan. The reason being is that it’s best to have dimension lines slightly away from the main body of the drawing so as not to clutter or confuse the actual looks of the house plan.
You’ll notice that I didn’t take the lines directly to the plan. The reason being is that it’s best to have dimension lines slightly away from the main body of the drawing so as not to clutter or confuse the actual looks of the house plan.
The next step is to measure a minimum of 6′-0″ from the house. There I want you to draw parallel lines very lightly. These will be your overall dimensions. Make your drawing look like the image below.
![[Image]](https://draftingboard.us/simple/pict72.jpg)
Lastly, I want you to measure 1′-0″ (12″) towards the house and lightly place another and then another until you have 3 lines on each dimension string total.
![[Image]](https://draftingboard.us/simple/pict73.jpg)
![[Image]](https://draftingboard.us/simple/pict74.jpg) STEP #1
STEP #1
OK then, lets get started with the dimensions and your new found ability to letter. I’ll show you how to do one overall dimension and then you do the rest. Darken the lines on the dimension leaders as shown to the left. Try to make them at least the same line weight as the walls so they’re visible and there’s no question where the dimension is referencing.
STEP #2
![[Image]](https://draftingboard.us/simple/pict76.jpg) Place a 45 degree tick (about 4″ to 6″ long) at each side of the dimension line. Try to keep your ticks uniform throughout the entire plan. Then draw two guide lines lightly at the center of the line for the dimension text.
Place a 45 degree tick (about 4″ to 6″ long) at each side of the dimension line. Try to keep your ticks uniform throughout the entire plan. Then draw two guide lines lightly at the center of the line for the dimension text.
![[Image]](https://draftingboard.us/simple/pict75.jpg)
STEP #3
Place the dimension text 2″ above the dimension line and make your text 4″ tall as shown below. When that’s complete, erase your guide lines so that they don’t detract from the drawing.
![[Image]](https://draftingboard.us/simple/pict77.jpg)
Now, you do the rest of the exterior dimensions.
![[Image]](https://draftingboard.us/simple/pict78.jpg) When completed, your drawing should look like the image to the left.
When completed, your drawing should look like the image to the left.
Dimensions should always be in a logical and predictable order. That’s why I had you draw the extra light lines. Dimension lines should always be in the following order:
- Main over all dimensions which we haven’t drawn yet.
- Exterior over all dimensions which we just drew.
- Interior wall dimensions.
- Exterior opening dimensions which includes doors and windows.
- Internal dimensions that cannot be defined with the outside dimensions.
*Make sure your exterior dimension numbers are all facing the same way horizontally for the horizontal dimensions and the same way vertically for all the vertical dimensions.*
The next step is to draw the internal wall dimensions. We use the same principle, except we either draw the dimension to one side of the wall or the other. It doesn’t matter which, but if you start on one side, make all on that one side! Keep it uniform.
![[Image]](https://draftingboard.us/simple/pict79.jpg)
After you complete your wall dimensions. Your drawing should look like the image above.
So the next stage of drawing dimensions should be the exterior openings. These take a little bit of extra work on your part. Exterior openings are dimensioned to the center of the opening and not necessarily from each side. Why? Because window manufacturers make different size rough openings. It’s easier for you to dimension to the center and let the framer figure out the opening size once he has the windows and doors in hand.
Draw your light lines to the center of the openings and then draw your dimensions to them on the inside lines as shown below. Don’t forget to erase your reference lines once your dimension is in place. Your drawing should now look like the image below.
![[Image]](https://draftingboard.us/simple/pict80.jpg)
![[Image]](https://draftingboard.us/simple/pict0.jpg) I need to mention interior dimensions even though we don’t need them for this house. Interior dimensions work the same as exterior. You still need to follow a logical order and make sure they are uniform.
I need to mention interior dimensions even though we don’t need them for this house. Interior dimensions work the same as exterior. You still need to follow a logical order and make sure they are uniform.
Another thing is that you will very seldom see is doors dimensioned from the inside unless the owner is wanting these doors to be in a very specific place.
To the left is an example of what those interior dimensions would look like if they were needed.
LABELING
This is where we complete the plan. You have practiced your lettering haven’t you?
Labeling is a simple matter of letting the reader know what they need to know. Below is a list of the labels we’re about to create:
- Room names:
- Room names will be drawn 8″ high. All that is required is the room name like BEDROOM or LIVING ROOM or KITCHEN.
- Door sizes:
- Door sizes need to be simple. Door sizes are 4″ high. If a door is 2′-8″ I simply put 2-8 in the swing of the door. I only add more to that label if there is something special about that door like it being 7′-0″ tall unlike the standard door which is 6′-8″ tall. That special label would look like this: 2-8/7-0.
- Window sizes:
- Window sizes are 4″ high and are similar to the doors except we do place both horizontal and vertical sizes. For instance, the front Living Room Window is 3′-0″ wide x 5′-0″ tall, so the label (which is always outside the plan) would be 3-0/5-0.
- Appliance & Fixture names:
- This one is simple. These are 4″ high. If it’s the range, the label is RANGE. If it’s the bathtub, we would place a note like TUB/SHWR COMBO. If it’s the bathroom vanity and sink the note would be 24″ VAN.
- Drawn by:
- This 4″ high and goes above the date in the bottom left hand corner. Mine will have DRAWN BY: TIM DAVIS
- Date of the drawing:
- This is the date your drawing was completed which is also 4″ high and goes in the bottom left hand corner of your drawing.
- Clients name:
- This would be the name of the person or persons you are completing the drawing for. It should be 12″ high and located in the top left hand corner of the drawing.
- Plan name & scale:
- This is a simple 12″ high label that will be underlined and say FLOOR PLAN. Then beneath FLOOR PLAN place SCALE: 1/4″ = 1′ – 0″ in 6″ letters.
- Construction notes:
- This is anything general or special to the plan and can be place anywhere you have the room. Generally these are also 4″ tall letters.
When you have completed this exercise, your plan should look like the image below.
![[Image]](https://draftingboard.us/simple/pict1.jpg)
![[Image]](https://draftingboard.us/simple/pict5.jpg) All that’s left to finishing up the plan is to dimension the porch. Do this by placing a dimension as shown to the left and you’re done.
All that’s left to finishing up the plan is to dimension the porch. Do this by placing a dimension as shown to the left and you’re done.
Your next step is to learn how to draw a complete set of House Plans! If you’ve completed this primer course, you’re now ready to learn the more advanced architecture courses on the drafting board. I hope you enjoyed taking this course as much as I enjoyed creating it.
Your Instructor, Tim Davis
I would love to see what you’ve learned here. Would you please take your drawing to a local office supply and have it scanned into a PDF file? Then email a copy to me so I can review it?