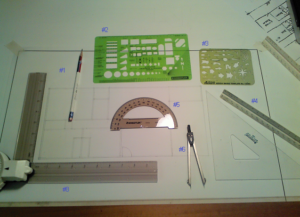
Unlike using the CAD program in the computer, there’s quite a few toys needed to have a properly equipped manual drafting station. Below, I’ll try to describe the tools we’ll be using for these courses. Hey, although these courses are pretty inexpensive compared to most all the others, you’ll still have to purchase the tools you’ll need to draw with. Just about every one of the goodies mentioned below can be found new on Amazon or used on Ebay. Not that I’m saying that’s where you have to shop. Just thought I’d mention a couple of sources…
The Drafting Board
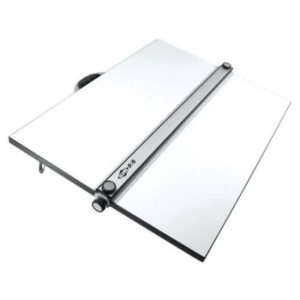
 This is one of the drafting boards I’ll be using for the lessons. It’s an Alvin 16″ x 21″ portable drafting board with a built-in parallel board.
- Parallel Bar – This is one of the most useful tool you can have. I’ll teach you later how to use a T-Square but to me, the parallel bar is the greatest invention since sliced bread.
- Smooth Board Surface – This particular surface is Melamine and very durable.
- Foldaway, rubber tipped legs – These raise the table so that it’s angled towards you making drawing somewhat easier where you don’t have to lean so much over the board.
This particular board handles “A” size 8-1/2″ X 11″ to “B” size paper which is 11″ x 17″. Most mechanical drawings for a machine or wood shop are drawn on these sizes.
Triangles, Compass, and Other Gear
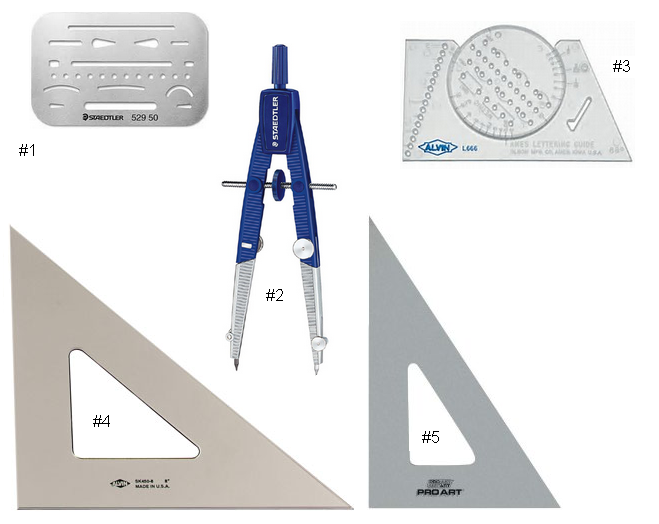
These are the tools used on the board.
- Eraser Shield – For erasing those things not need and not erasing the things that are needed. You place this thin metal strip over the drawing and it shields the lines you wish to keep.
- Bow Compass – This is used for drawing circles and/or an arc. It’s equipped with a pin or needle on one arm to hold it to your paper and a pencil lead to draw the actual circle or arc.
- Lettering Guide – This tool is used to draw guidelines for your text without having to measure each one individually.
- 45º Triangle – Used for drawing both vertical 90º and angled 45º lines. Combined with another odd angle triangle can also draw various angled lines.
- 30º Triangle – Used for drawing both 30º and 60º angled lines. Combined with another odd angle triangle can also draw various angled lines.
Here is my other drafting board. It’s a 30″ x 42″ portable drafting board with a built-in parallel board. It’s built exactly the same as my 16″ x 21″ board but larger. I’ll be using it for the larger architectural and survey drawings on 24″ x 36″ paper. I did remove the parallel bar because the ends broke. I use a Tee Square (ancient history) with it however. Anyone have an extra 42″ parallel bar they aren’t using?
Other Tools
- Pencils – Here’s a surprise for you… It’s not necessary to buy a special pencil or various leads. I use a #2 lead pencil that can be bought at any place that sells school and office supplies. I learned very quickly that all you need for your pencil lines is control over the pressure you use when drawing your lines. Light pressure = light lines. More pressure = darker lines. The better lead (graphite) can be found in most of the “round & not hexagonal” pencils made in China. Go figure.
- Architectural Template – This is a Staedtler 1/4″ scale architectural template that has wall thickness gauges, various size door swings, plumbing shapes, roof pitches, etc. A very handy tool.
- Surveyors Template – This is a Pickett Arrow Template No. 12081 for drawing north arrows and such. This would be handy when drawing a Site Plan or Survey. The arrows can also be used on other types of drawings.
- Triangle Architectural Scale – This is the Alvin No. 110 P Architectural Scale. On this scale, feet and inches are taken to a smaller scale. It includes 1/8″ = 1′-0″ all the way to 3″ = 1′-0″. The other scale you’ll need is the Engineers Scale, which is used for machine and survey drawings.
- Protractor – The Staedtler 1/2 round protractor #568 52-15. Great for working out angles on your drawings from a full 180º.
- Alvin Divider – This looks like a compass without the adjustment screw but it isn’t. The divider is used as a gauge of distance it you’re using the same distance in different places on your drawings.
- To be listed at a later date
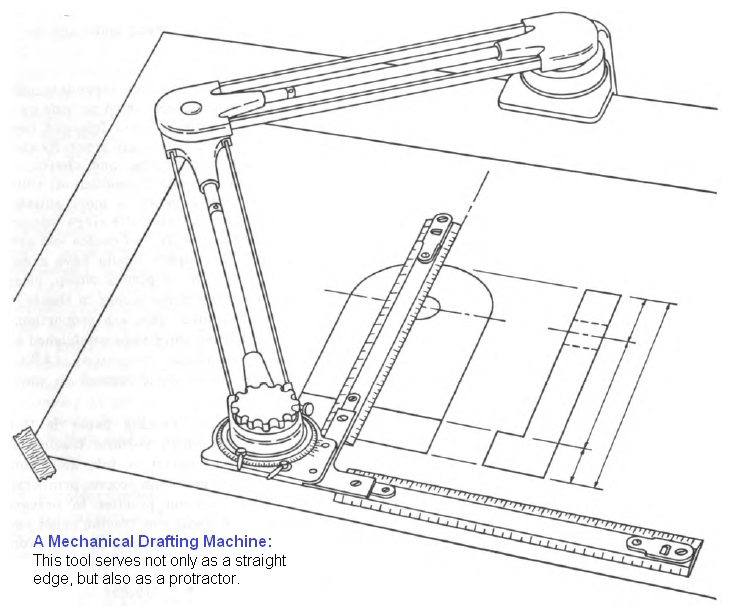
- Drafting Machine – This particular tool is kinda neat to have. With it’s extended and elbow will travel all areas of your drafting board and stay at the exact angle you’ve set it to. I kinda think I wasted money on this particular brand as the main parts are made of plastic and flexes while you’re drawing. I’ll buy one of the more sturdy metal types once my funds allow.
Under Construction